You want to grow fresh veggies or flowers with less hassle. You can build a raised garden bed for easier gardening, better soil, and simple access. Beginners love the COMHOMA Raised Garden Bed because it comes with handy tools. Grab your gloves—let’s get started!
Key Takeaways
-
Raised garden beds make soil better and drain water well. This helps plants grow healthy and strong.
-
Pick a sunny spot with good drainage for your raised bed. This will help your plants grow their best.
-
Use topsoil, compost, and drainage materials for your soil mix. This gives your raised garden bed the best soil.
Why Build Raised Garden Beds
Benefits of Raised Garden Beds
You might wonder why so many gardeners choose raised garden beds. These beds make gardening possible almost anywhere—even if your yard has poor soil or lots of rocks. You get to control the soil quality, which means your plants can grow stronger and healthier. Raised garden beds warm up fast in spring, so you can start planting earlier. The soil drains better, so roots stay happy and healthy.
Here are some reasons you’ll love using raised garden beds:
-
You don’t have to bend or kneel as much, which makes gardening easier on your back and knees.
-
Raised beds help keep weeds out, so you spend less time pulling them.
-
You can plant more in a small space because roots have room to grow down.
-
The soil stays loose and doesn’t get packed down, so water and air reach the roots.
-
Raised beds look neat and tidy, making your garden more attractive.
Tip: If you have trouble bending or use a wheelchair, an elevated raised bed or a taller bed can make gardening much more comfortable.
Common Uses
You can grow almost anything in raised garden beds. Many gardeners use them for vegetables like radishes, turnips, sugar snap peas, kale, and spinach. Flowers and herbs also do well. Raised garden beds work great for people who want to garden in small yards, on patios, or even over concrete.
If you want a simple start, the COMHOMA Raised Garden Bed comes with tools and gloves, making it easy for beginners. Raised garden beds also help you manage water better, especially if you use drip irrigation. You’ll find that your plants grow faster and stronger, and you’ll spend less time weeding and more time enjoying your garden.
Tools and Materials for Raised Garden Bed
Tools Checklist, COMHOMA Raised garden bed covers all
You need some basic tools before you start building. You might already have these in your garage. If not, you can ask a neighbor to borrow them. The COMHOMA Raised Garden Bed kit has gloves and tools. This kit makes your project much easier.
Here’s what you’ll need:
-
Drill (cordless or corded)
-
Screws or fasteners (about 24-32 for a standard 4×8 bed)
-
Saw (hand saw or circular saw)
-
Measuring tape (25-foot works great)
-
Level (2-4 foot)
-
Work gloves (1 pair)
-
Safety glasses (1 pair)
Tip: These tools do not cost much. You can find them at most hardware stores. If you do not have one, try to borrow or buy used. This can help you save money.
Materials and Measurements
Picking the right materials helps your raised bed last longer. It also makes your garden look nice. Here is a quick guide to some popular choices:
|
Material |
Durability |
Average Cost |
|---|---|---|
|
Untreated Cedar |
5-10 years |
$150 |
|
Galvanized Steel |
25+ years |
$250 |
|
Composite |
Long-lasting |
Varies |
|
Stone |
Lifetime |
Higher upfront |
|
Concrete |
Lifetime |
Higher upfront |
|
Recycled Plastics |
Durable, budget-friendly |
Varies |
A 4x8 foot bed with a depth of 12-18 inches is a good size. This gives your plants enough space and makes it easy to reach them. Untreated cedar is a good choice if you want something cheap and natural. Galvanized steel and composite materials last longer and need less care.
Note: Buying in bulk or sharing costs with a friend can help you save money.
How to Build Raised Garden Beds: Preparation
Choosing a Location
Picking the right spot is the first step in how to build raised garden beds. You want your plants to get plenty of sunshine. Look for a place in your yard that gets at least six hours of direct sunlight every day. If you can find a spot with eight hours, that’s even better. Sunlight helps your veggies and flowers grow strong.
Think about water, too. You’ll want your raised bed close to a hose or water source. This makes watering much easier, especially in hot weather. If you use the COMHOMA Raised Garden Bed, you can set it up almost anywhere—even on a patio or over concrete.
Here’s a quick checklist for choosing your spot:
-
Gets at least 6-8 hours of sunlight daily
-
Near a water source for easy watering
-
Flat area with good drainage
Tip: Avoid placing your bed under trees or next to large bushes. These can block sunlight and steal water from your plants.
Clearing and Leveling the Ground
Now you’re ready for the next part of how to build raised garden beds. Start by clearing away grass, weeds, and any big rocks. You want a clean area so your bed sits flat and stable.
Use a shovel to dig out any high spots. Check your work with a level. A flat surface keeps your raised bed from warping or bowing over time. This step helps your garden bed last longer and keeps your plants happy.
If you follow these steps, you’ll have a perfect spot for your new garden. You’re almost ready for the fun part—building the frame!
Step-by-Step Instructions: Building the Frame

Building your elevated raised bed frame is the most hands-on part of the project. These step-by-step instructions will help you create a sturdy and long-lasting raised garden bed. You do not need to be a pro—just follow along and take your time.
Measuring and Cutting Boards
You want your diy elevated garden bed to look neat and fit your space. Accurate measuring and cutting make a big difference. Here’s how you can do it:
-
Grab your measuring tape and speed square. Mark two boards to exactly 10 feet.
-
Use your circular saw to trim off any extra wood.
-
Take an 8-foot board and cut it in half. You will get two 4-foot pieces for the short sides.
-
Support each board with sawhorses or something sturdy before you cut.
-
Decide which side of each board you want facing out. Check for any bowing or warping.
Tip: Always measure twice and cut once. This helps you avoid mistakes and wasted wood.
Choosing the right material for your elevated raised bed matters, too. Here’s a quick look at your options:
|
Material Type |
Durability |
Notes |
|---|---|---|
|
Untreated Wood |
Low |
Can warp, crack, or splinter over time. |
|
Cedar or Redwood |
High |
Resists moisture and insects; lasts 5-10 years. |
|
Untreated Pine |
Low |
May last only a few seasons, especially in wet climates. |
|
Metal (Galvanized) |
Very High |
Strong and lasts for decades. |
|
Composite Materials |
High |
Handles weather well; won’t warp or fade. |
If you want a safe option for veggies, use untreated, rot-resistant wood. Composite or metal works well if you want your elevated raised bed to last even longer. Look for eco-friendly lumber if you care about the environment.
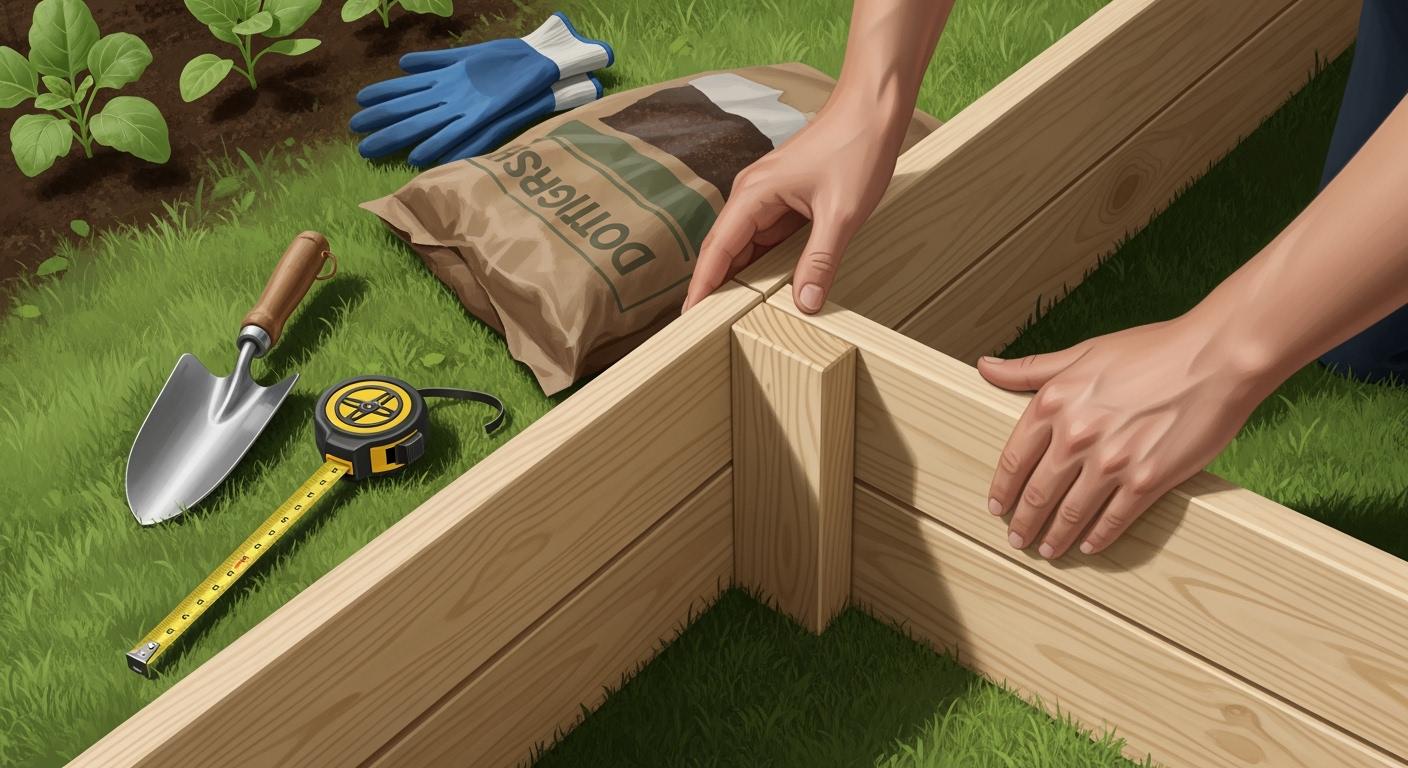
Attaching Corner Pegs
Corner pegs give your raised garden bed frame strength and keep it square. You want your diy elevated garden bed to stay sturdy for years. Here’s what you do:
-
Place a corner peg at each inside corner of your frame.
-
Make sure the pegs are flush with the top edge of the boards.
-
Use your drill to attach the boards to the pegs with screws. Put in at least two screws per board end.
-
Check that each corner forms a right angle. Use your speed square to help.
Note: If you use the COMHOMA Raised Garden Bed kit, you get pre-drilled holes and hardware. This makes attaching the corners much easier.
Assembling the Frame
Now you get to see your elevated raised bed take shape. Lay out your cut boards and corner pegs on the ground where you want to build. Follow these steps:
-
Line up the long and short boards to form a rectangle.
-
Attach each board end to a corner peg using your drill and screws.
-
Double-check that the frame is square. Measure the diagonals—they should match.
-
Tighten all screws so the frame feels solid.
Here are some common mistakes you want to avoid:
-
Do not build your raised garden bed too short. Shallow beds limit root growth and make gardening harder.
-
Avoid making your bed too wide or too narrow. Wide beds are hard to reach across, and narrow beds waste space.
-
Do not use thin boards. Thin materials can bend or break over time.
Callout: Take your time with this step. A strong frame means your elevated raised bed will last for many seasons.
You have finished the hardest part! Your diy elevated garden bed frame is ready for the next steps. You can now move on to placing your frame and preparing the ground for planting.
Positioning and Ground Prep
Placing the Frame
You have your frame ready. Now, it’s time to put it in place. This step helps your raised garden bed stay strong and look neat for years. Here’s a simple way to get it right:
-
Pick up your frame and carry it to the sunny spot you cleared earlier. Make sure the area is free of rocks and roots.
-
Set the frame down and check that each corner sits flat on the ground. If you use the COMHOMA Raised Garden Bed, the lightweight design makes this step easy.
-
Align the corners so the bed forms a perfect rectangle. Use a measuring tape to check both diagonals. If the numbers match, your bed is square.
-
Place blocks or pegs at each corner. This keeps the frame from shifting when you add soil.
-
Push rebar stakes through the corner blocks if you want extra stability. This step helps your bed stay put, even after heavy rain.
Tip: Take a step back and look at your bed from all sides. A straight, even frame makes your garden look professional.
Final Leveling and Adjustments
You want your raised garden bed to sit level. This helps water spread evenly and keeps soil from washing out. Try these steps:
-
Use tall stakes and string to outline the bed. Stretch the string tight and use a line level to check for flatness.
-
Remove any bumps or dips with a shovel. Tamp down the soil to make a firm base.
-
Dig a shallow trench along the uphill side if your yard slopes. This keeps your bed from tilting.
-
Check the frame with your level again. Adjust as needed until every side sits flat.
-
Fill in gaps under the frame with soil or sand. This gives your bed a solid foundation.
You’re now ready to build a garden that will last for many seasons.
Filling and Planting in Raised Garden Beds
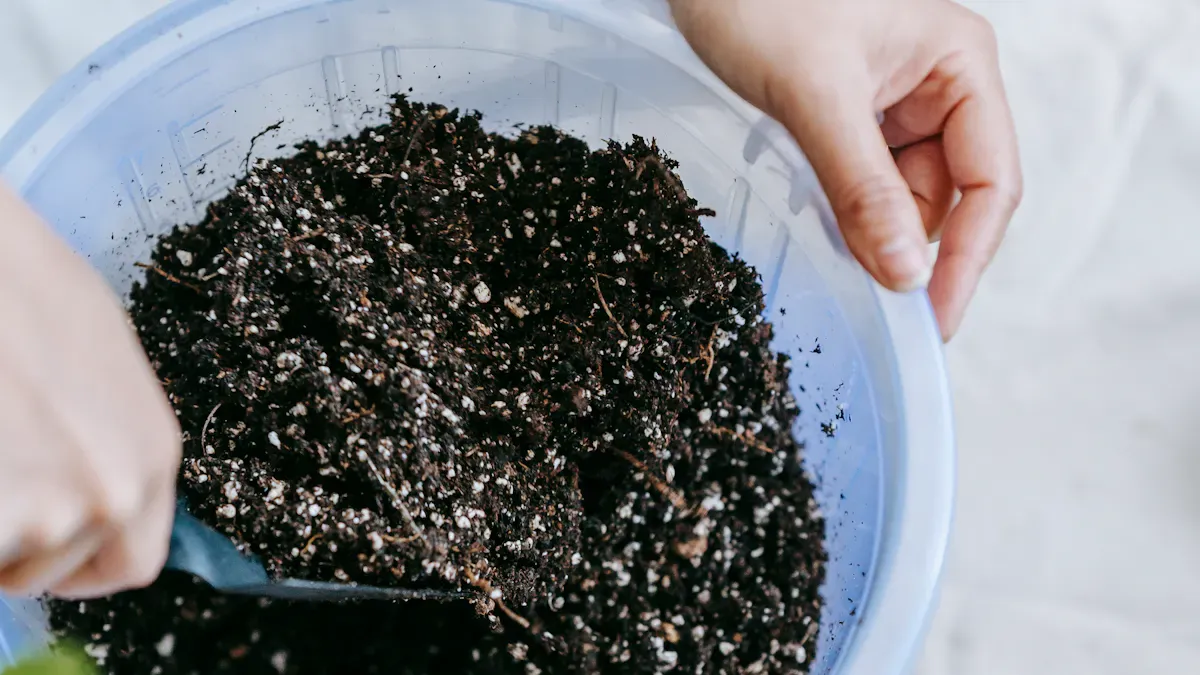
Adding Soil Mix
You want your plants to thrive, so picking the right soil mix matters. Start with a blend of topsoil, compost, and a bit of sand or perlite for drainage. Compost gives your plants nutrients and helps the soil stay loose. You can also add aged manure or vermicompost for an extra boost. Here’s a quick look at common soil amendments:
|
Soil Amendment |
Benefits |
|---|---|
|
Compost |
Adds nutrients and improves soil structure |
|
Vermicompost |
Boosts nutrients; works well with other soils |
|
Aged Manure |
Rich in nutrients; must be well-aged |
|
Peat Moss |
Holds water and air; lowers soil pH |
|
Coconut Coir |
Keeps soil moist; eco-friendly alternative |
Fill your raised bed about three-quarters full with your mix. If you use the COMHOMA Raised Garden Bed, the deep sides make it easy to add layers and keep everything tidy.
Tip: Test your soil by digging a small hole and filling it with water. If it drains in less than an hour, you have good drainage.
Planting Tips and Drainage
Now you get to plant! Try these ideas to make the most of your space:
-
Use companion planting. For example, plant carrots with onions or radishes with spinach.
-
Try the Square Foot Gardening method. Mark off squares and plant each with a different crop.
-
Plant in layers. Put tall plants in the back, climbing plants in the middle, and low growers in front.
-
Practice succession planting. After you harvest one crop, plant another in its place.
Good drainage keeps roots healthy. Raise your bed at least 6 inches. Add a layer of gravel at the bottom if your yard stays wet. Mulch the top to keep weeds down and soil moist.
You can build a vegetable garden that grows strong and looks great. Raised beds make it easy to try new planting ideas and keep your garden productive all season.
You did it! You built your raised garden bed and set yourself up for a great harvest. Most gardeners feel proud and happy with their results—just like those who tried the COMHOMA Raised Garden Bed.
Next, plan what you want to grow, fill your bed with the right soil, and share your garden’s progress with friends!
-
Remember to space your plants well.
-
Try adding a liner if you want extra weed control.
-
Enjoy watching your plants thrive.
FAQ
How deep should my raised garden bed be?
Most plants grow well in 12 to 18 inches of soil. You can use the COMHOMA Raised Garden Bed for this depth.
Can I put a raised garden bed on concrete?
Yes! You can place your raised bed on concrete. Just make sure you add good soil and check for drainage.
Do I need to line the bottom of my raised bed?
You don’t have to, but a liner helps stop weeds and keeps soil in place. Landscape fabric works great.


Share:
5 Key Advantages of Using Raised Garden Beds in Your Backyard
How to Choose the Right Big and Tall Office Chair for Maximum Comfort